
Manage Vendor, Sanitation Worker and Vehicle Details
The FSM Registry allows for the following actions from the frontend for a particular urban local body (ULB):
Add a new sanitation worker, vehicle, vendor.
Edit sanitation worker, vehicle, vendor details.
Enable and disable sanitation workers, vehicles and vendors.
Tag a sanitation worker and vehicle to vendors.
View and Edit Vendor Details
Login as a ULB admin and navigate to the FSM registry by clicking on it.

User Actions
The following actions can be performed:
View a list of all vendors in the system along with the details of tagged vehicles and sanitation workers.
Search for a vendor using the search box.
Clear search by using the "Clear Search" button.
Enable/disable a vendor by using the toggle.
Sort vendors by creation date.
View total vehicles tagged to the vendor by clicking on the value to “Total Vehicles”.
View active vehicles tagged to the vendor by clicking on the value to “Total Vehicles”.
View total sanitation workers tagged to the vendor by clicking on the value to “Total sanitation workers”.
View active sanitation workers tagged to the vendor by clicking on the value to “Total sanitation workers”.
Add a new vendor, sanitation worker or vehicle by clicking on the ‘Add’ button.
View Vendor List
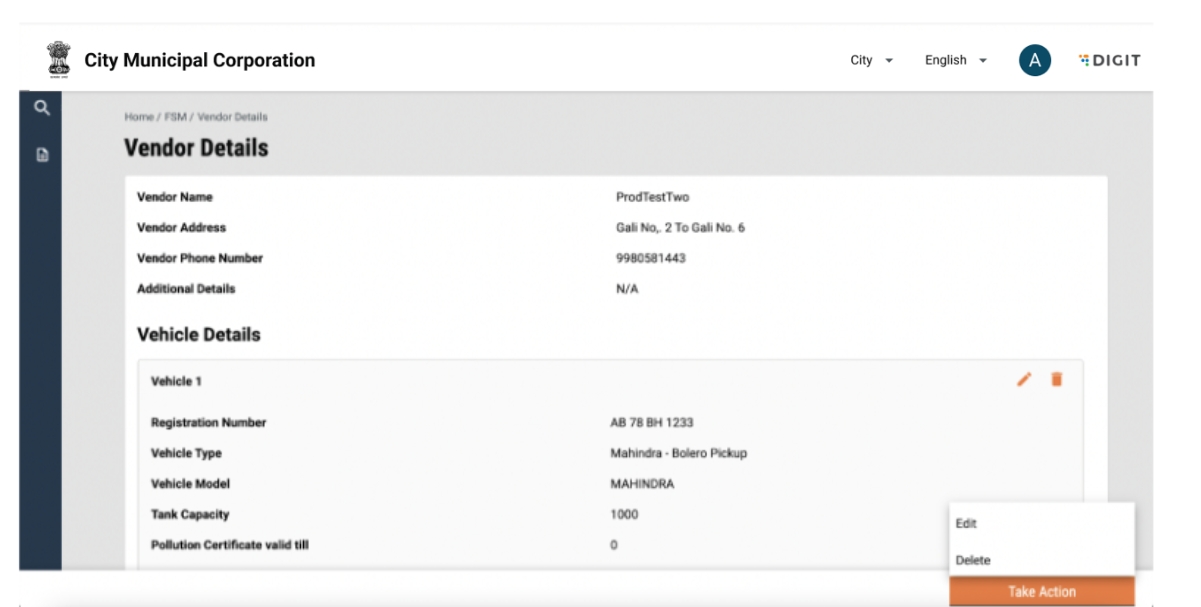
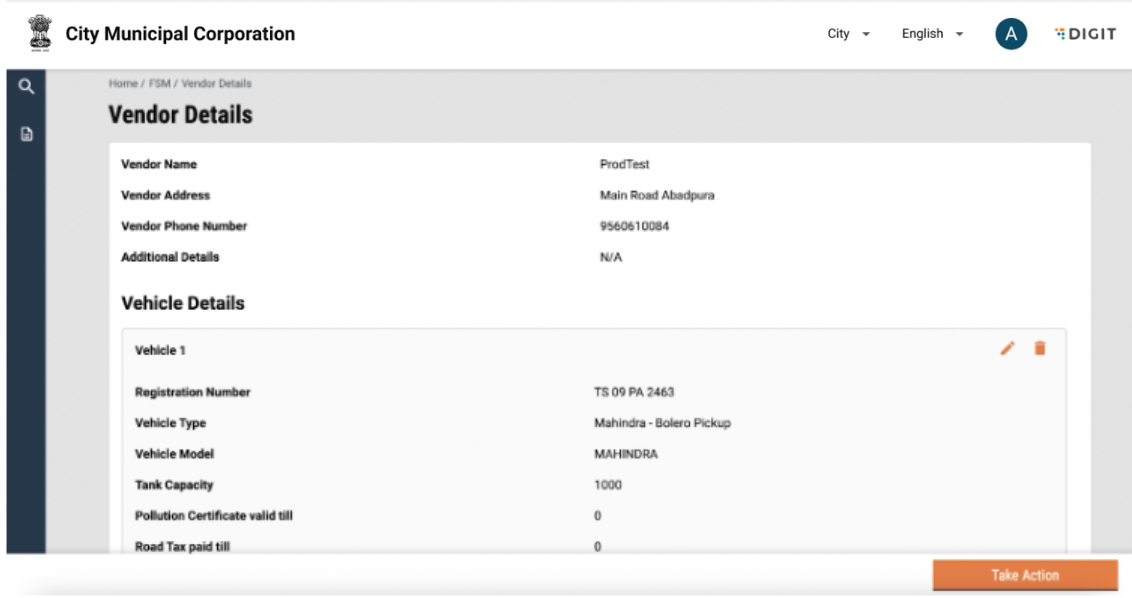
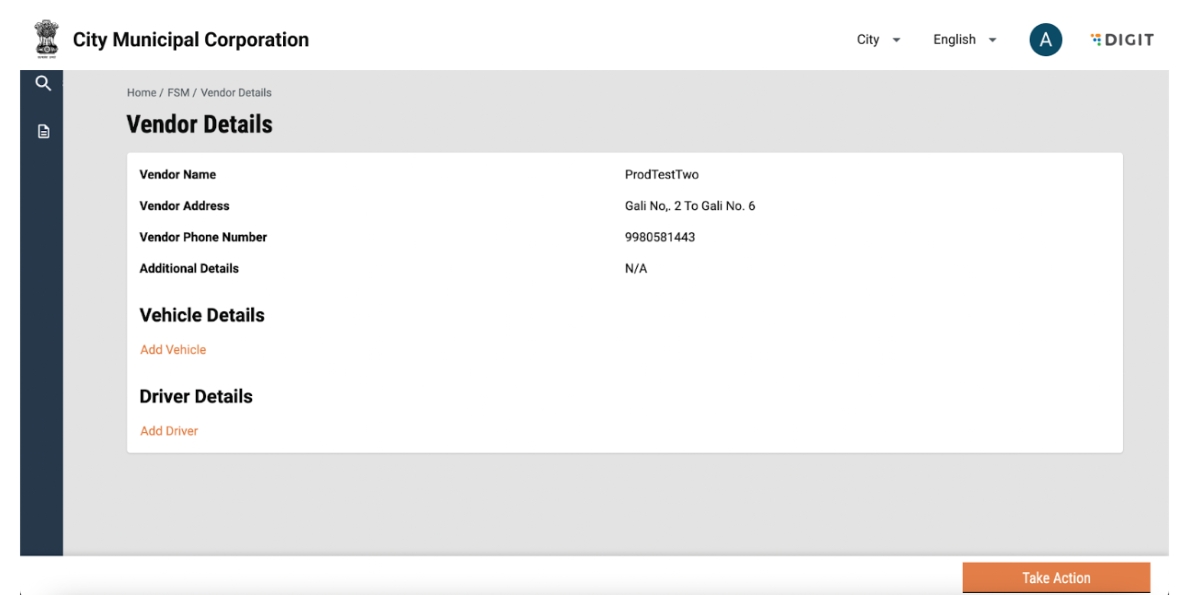
Vendor details can be viewed by clicking on the vendor name in the FSM Registry homepage.

User Actions
The following actions can be performed:
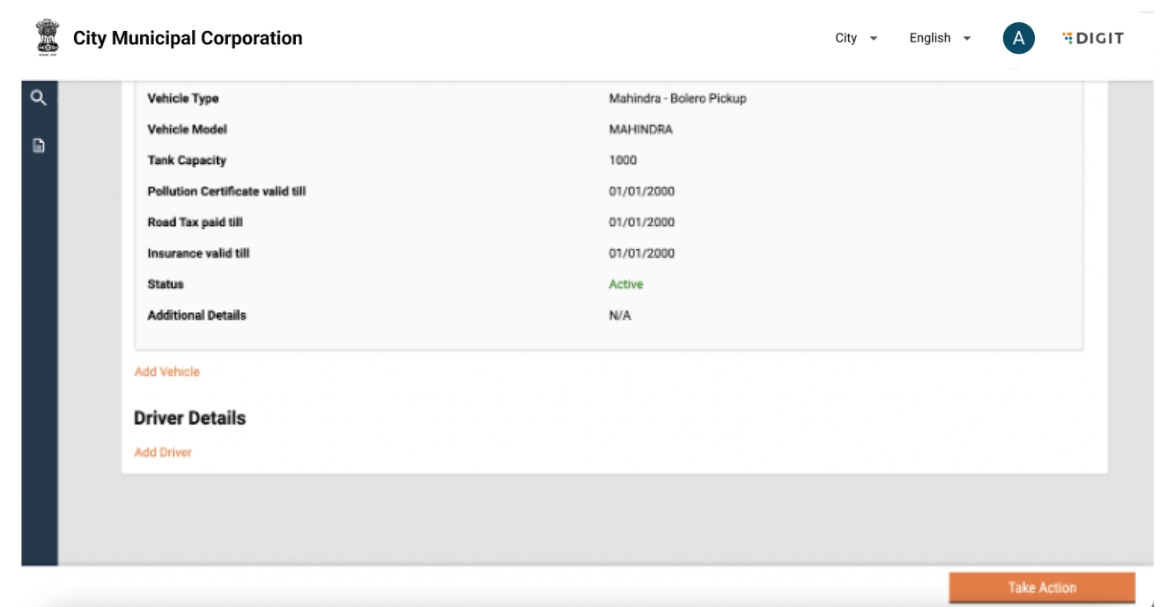
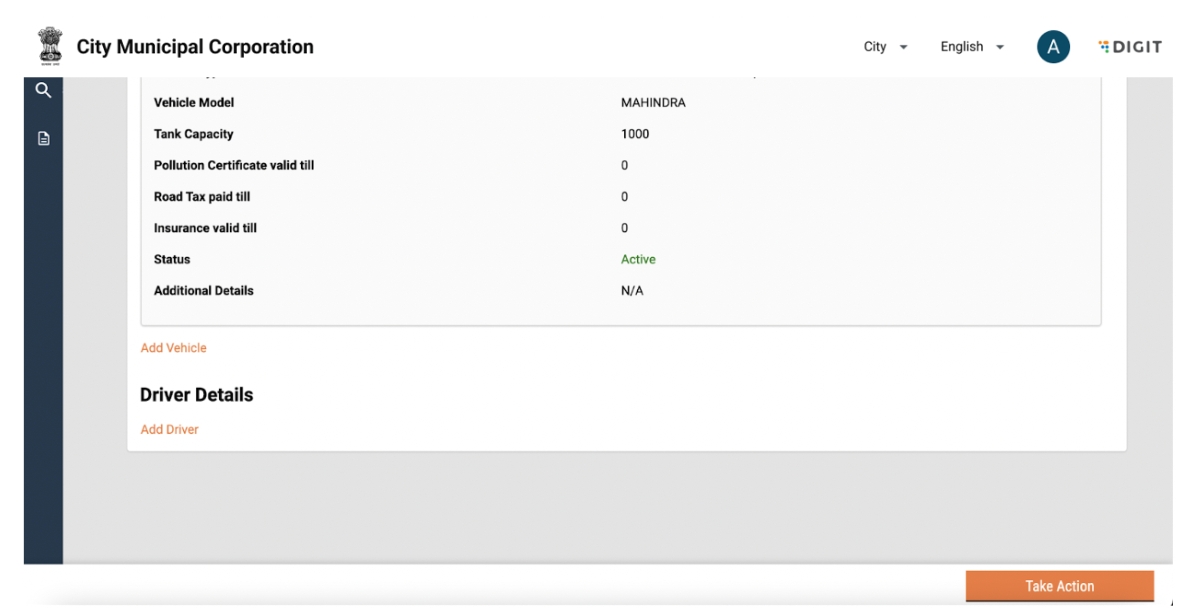
View vendor details along with tagged vehicles and sanitation workers.
Tag a new vehicle to the vendor by clicking on the “Add Vehicle” button.
Remove a tagged vehicle by clicking on ‘Delete’ on the top right of the vehicle card.
Edit vehicle details by clicking on the ‘Edit’ symbol on the top right of the vehicle card.
Tag a new sanitation worker to the Vendor by clicking on the “Add Sanitation Worker” button.
Remove a tagged sanitation worker by clicking on the ‘Delete’ symbol on the top right of vehicle card.
Edit sanitation worker details by clicking on the ‘Edit’ symbol on the top right of the vehicle card.
The details of a vendor can be edited or a vendor deleted by clicking on the “Take Action” button.
Clicking on the ‘Edit’ button as part of the “Take Action” button will redirect the user to the “Edit Vendor” details page.
Edit Vendor Details
User Actions
The following actions can be performed:
Edit vendor details.
Submit application.
The user will be redirected to the list of vendors, and a snack bar will confirm edit.
Delete Vendor

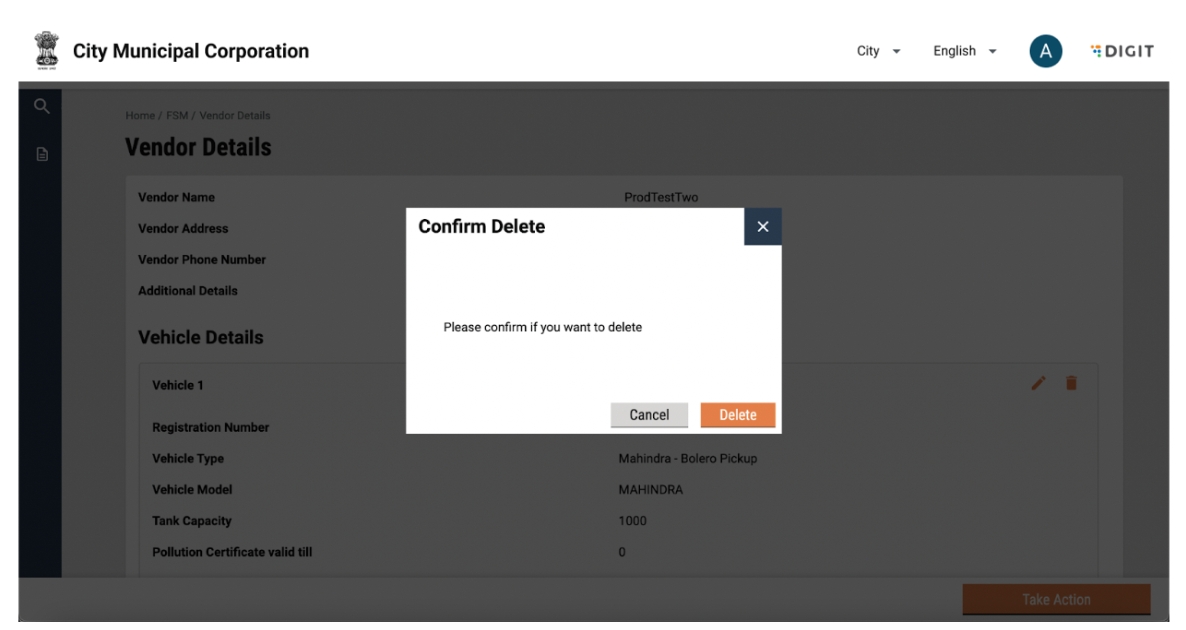
A vendor can be deleted by clicking on the “Take Action” button and selecting delete. A pop-up will appear on the screen.
User Actions
The following actions can be performed:
Confirm delete.
Close pop-up by clicking on the 'Close' button on the pop-up.
Close pop-up by clicking on the cross icon on the top right of the pop-up
The user will be redirected to the list of vendors, and a snack bar will confirm delete.
Tagging Vehicles and sanitation Workers to a Vendor
Multiple vehicles can be tagged to a vendor. It is necessary that a vehicle exists in the system before it can be tagged. A vehicle can be tagged to a vendor by clicking on the “Add Vehicle” button in the vendor details page.
User Actions
The following actions can be performed:
View vendor details along with tagged vehicles and sanitation workers.
Tag a new vehicle to the vendor by clicking on the “Add Vehicle” button.
Remove a tagged vehicle by clicking on the ‘Delete’ symbol on the top right of vehicle card.
Edit vehicle details by clicking on the ‘Edit’ symbol on the top right of the vehicle card.
Tag a new sanitation worker to the vendor by clicking on the “Add sanitation worker” button.
Remove a tagged sanitation worker by clicking on the ‘Delete’ symbol on the top right of vehicle card.
Edit sanitation worker details by clicking on the ‘Edit’ symbol on the top right of the vehicle card.
The details of a vendor can be edited or a vendor deleted by clicking on the “Take Action” button.
Clicking on “Add Vehicle” will display a pop-up.
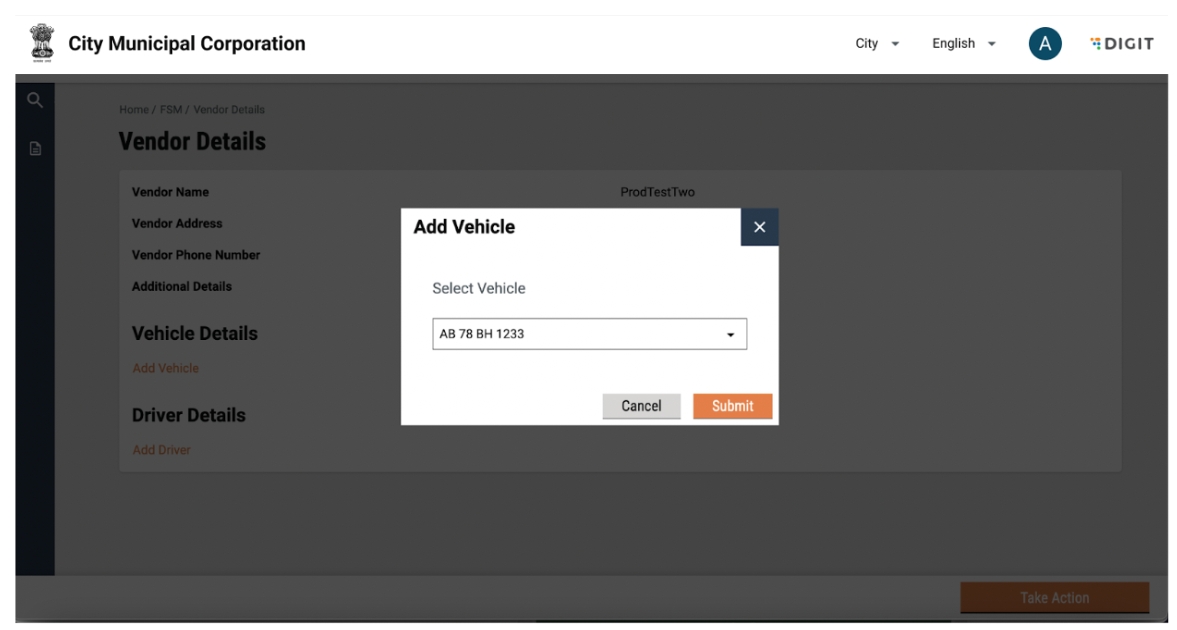
Only vehicles that are not tagged to any vendor will be displayed.
User Actions
The following actions can be performed:
Select vehicle from the dropdown.
Click on 'Submit' to confirm.
Close pop-up by clicking on the Close button on the pop-up.
Close pop-up by clicking on the cross icon on the top right of the pop-up.
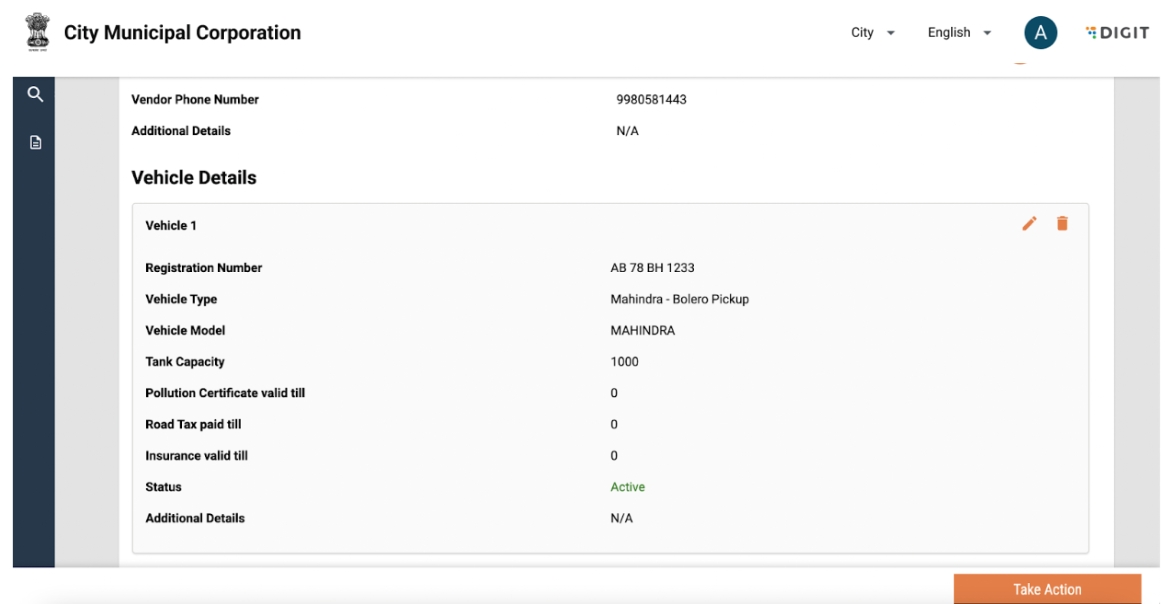
The user will be able to see the tagged vehicle in the vehicle details section. The vehicle can be untagged from the vendor by clicking on the delete button against the vehicle details.
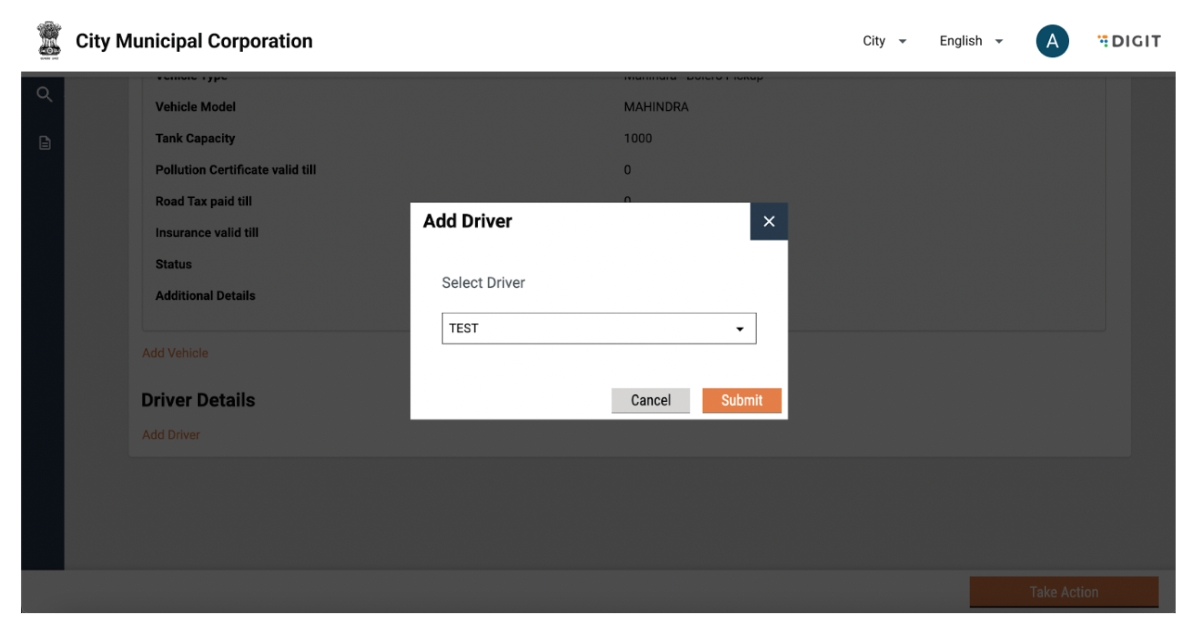
Multiple sanitation workers can be tagged to a vendor. It is necessary that a sanitation worker exists in the system before he/she can be tagged. A sanitation worker can be tagged to a vendor by clicking on the “Add sanitation worker” button in the vendor details page.
A pop-up will be displayed with a dropdown to select a sanitation worker. Only sanitation workers that are not tagged to any vendor will be displayed.
User Actions
The following actions can be performed:
Select sanitation worker from the dropdown.
Click on 'Submit' to confirm.
Close pop-up by clicking on the 'Close' button on the pop-up.
Close pop-up by clicking on the cross icon on the top right of the pop-up
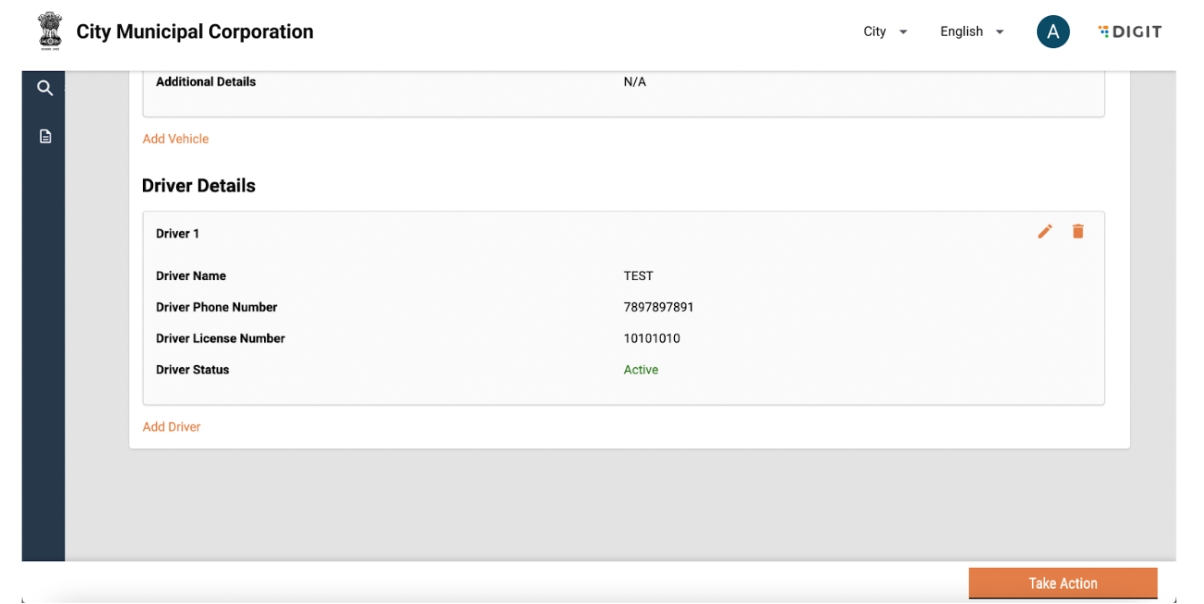
The added sanitation worker details will be displayed. The sanitation worker can be untagged from the vendor by clicking on the delete button against the sanitation worker details.
Adding a New Vendor
A new vendor can be added by clicking on the ‘Add’ button on the FSM Registry landing page.

User Actions
The following actions can be performed:
Add a new vendor by clicking on vendor.
Add a new vehicle by clicking on vehicle.
Add a new sanitation worker by clicking on sanitation worker.
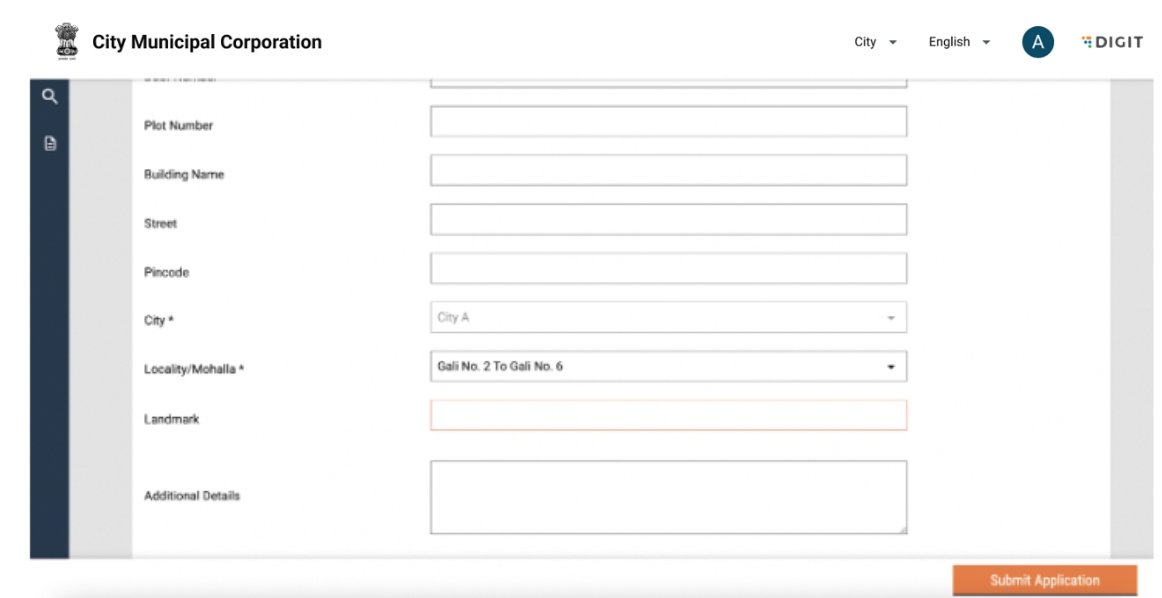
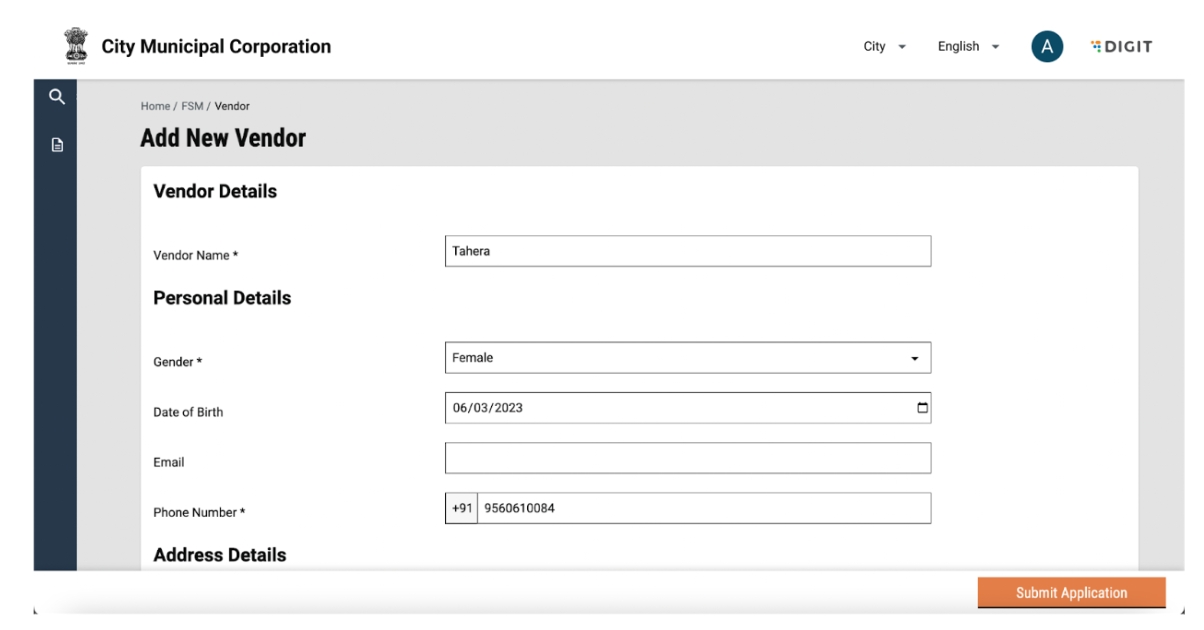
On clicking on vendor, the user will be redirected to the add vendor page.
User Actions
The following actions can be performed:
Enter vendor name.
Select vendor owner details such as Gender, Date of Birth, Email and Phone number. Each vendor is created with a unique mobile number and hence, an error message will be displayed if the mobile number has been used to create other vendors.
Enter address details.
Submit the application.
Once the user submits an application, a snack bar will confirm the successful addition of a vendor.

Details of the added vendor will be displayed in the vendor list.

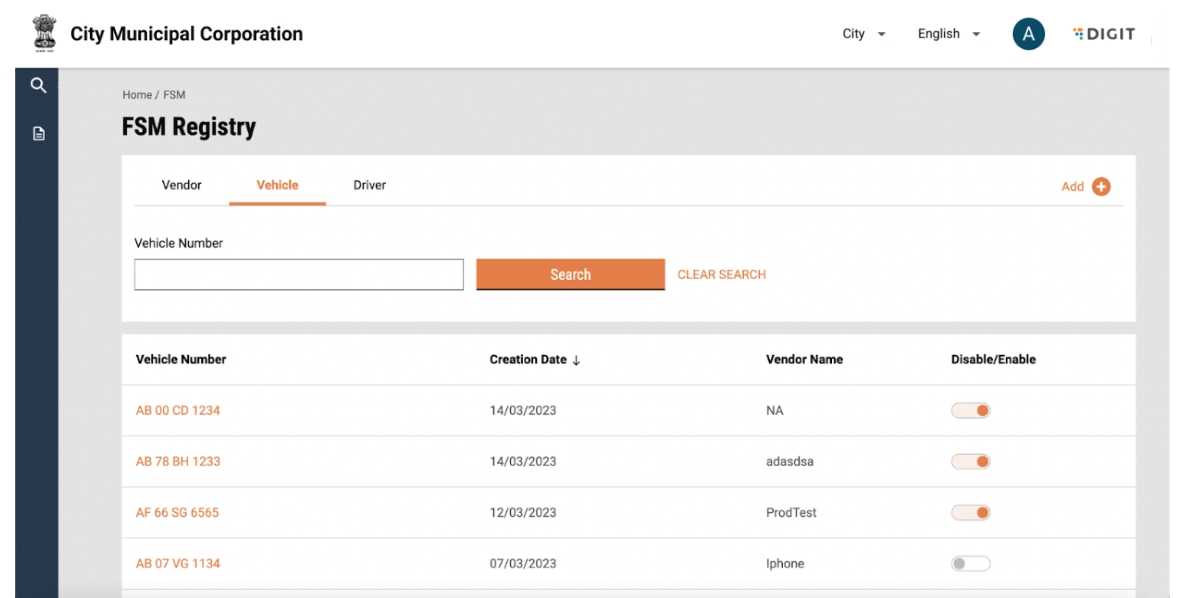
View Vehicle List
The vehicle list can be viewed by clicking on the vehicle tab in the DSM registry.
A list of all vehicles in the system are visible along with the details of the vendor they are tagged to.
User Actions
The following actions can be performed:
View list of all vehicles in the system along with the details of tagged vendor.
Search for a vehicle using the search box.
Clear search by using the “Clear Search” button.
Enable/disable a vehicle by using the toggle.
Sort vehicles by creation date.
Add a new vendor, sanitation worker or vehicle by clicking on the ‘Add’ button.

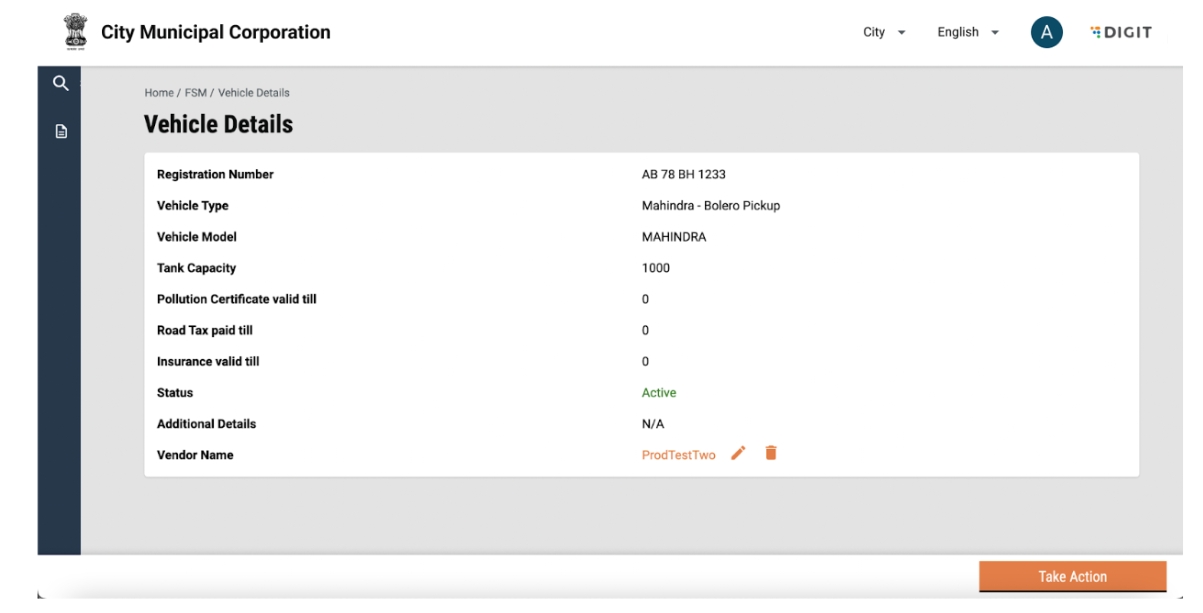
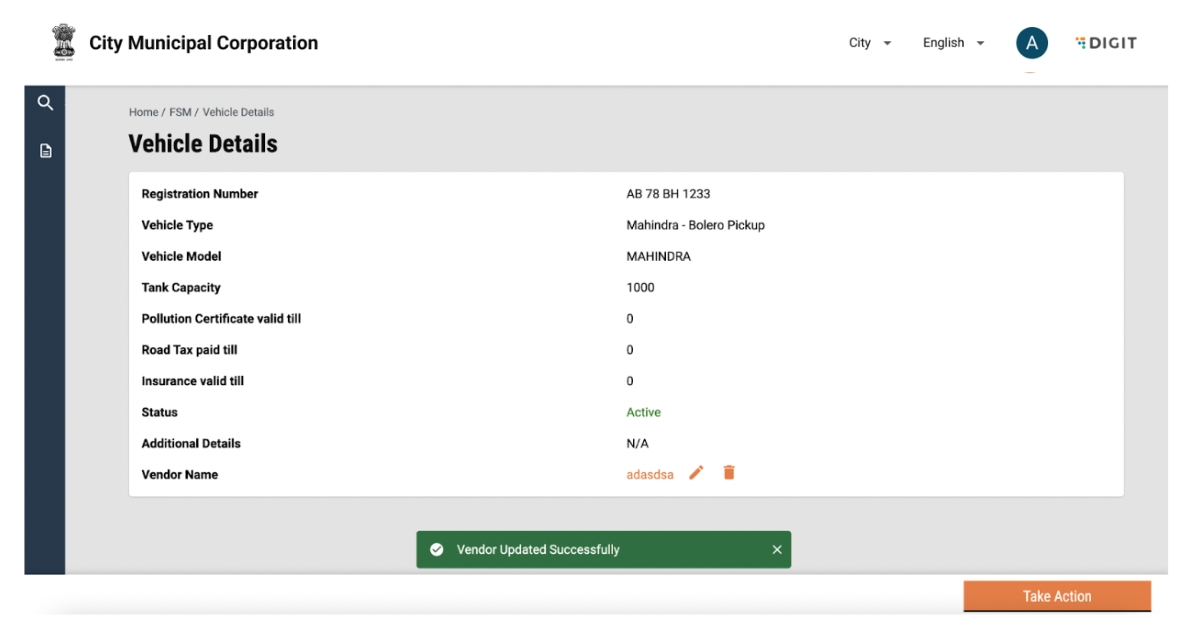
View Vehicle Details
Vehicle details can be viewed by clicking on the vehicle name.

User Actions
The following actions can be performed:
View details of the vehicle.
Edit vendor tagging by clicking on the edit icon besides the vendor name.
Remove vendor tagging by clicking on the 'Delete' icon besides the vendor name.
Click on the “Take Action” button to edit or delete a vehicle.
Edit Vehicle Details
On clicking on the “Take Action” button, the following will be displayed.
User Actions
The following actions can be performed:
Click on edit to edit the vehicle.
Click on delete to delete the vehicle.
Click anywhere else on the screen to go back to vehicle details.
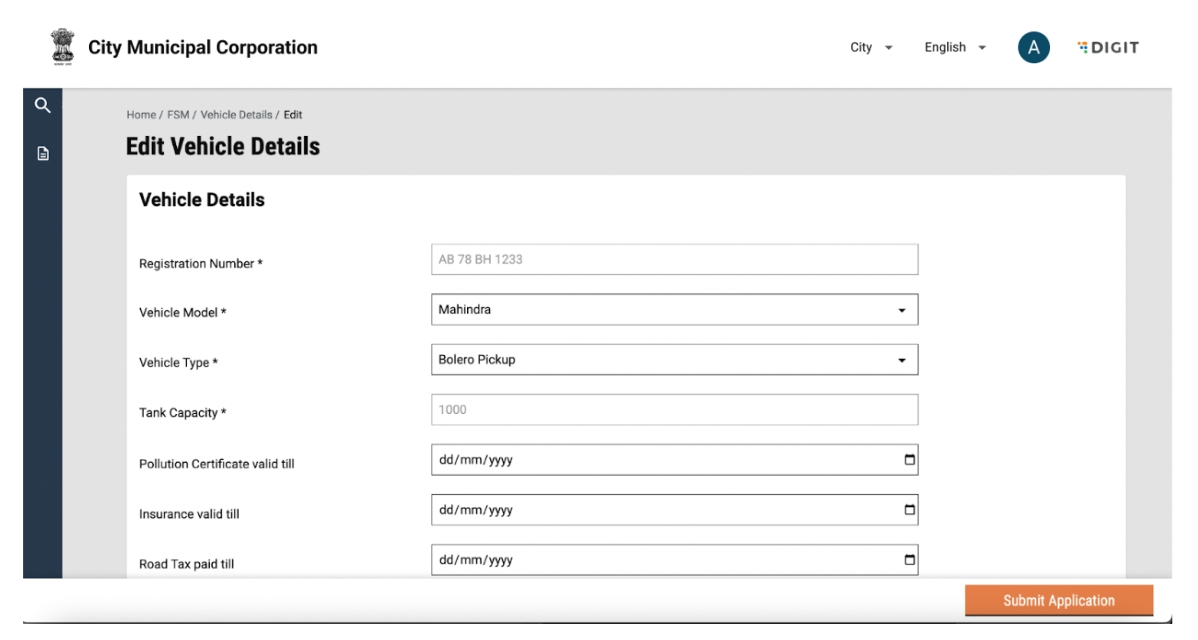
On clicking on the edit button, the user will be redirected to the “Edit Vehicle” page.
User Actions
The following actions can be performed:
Edit vehicle details.
Submit edited details.
The user will be redirected to the vehicle details page and the edits will be reflected.
Delete Vehicle Details
A vehicle can be deleted by clicking on the “Take Action” button and selecting delete.

User Actions
The following actions can be performed:
Click on edit to edit the vehicle.
Click on delete to delete the vehicle.
Click anywhere else on the screen to go back to vehicle details.
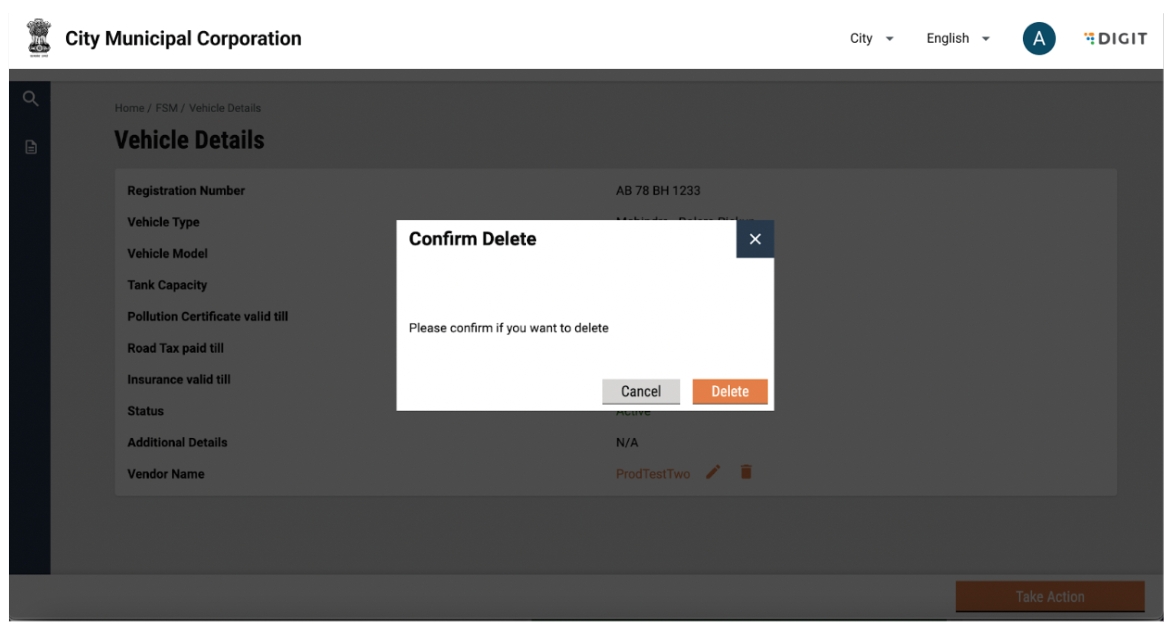
On clicking the delete button, a pop-up will be displayed for confirmation.
User Actions
The following actions can be performed:
Close pop-up by clicking on the 'Close' button on the pop-up.
Close pop-up by clicking on the cross icon on the top right of the pop-u
Confirm deletion by clicking on the delete button.
On clicking on ‘Delete', the user will be directed to a list of vehicles and a snack bar will be displayed as confirmation.
Tagging a Vehicle to a Vendor
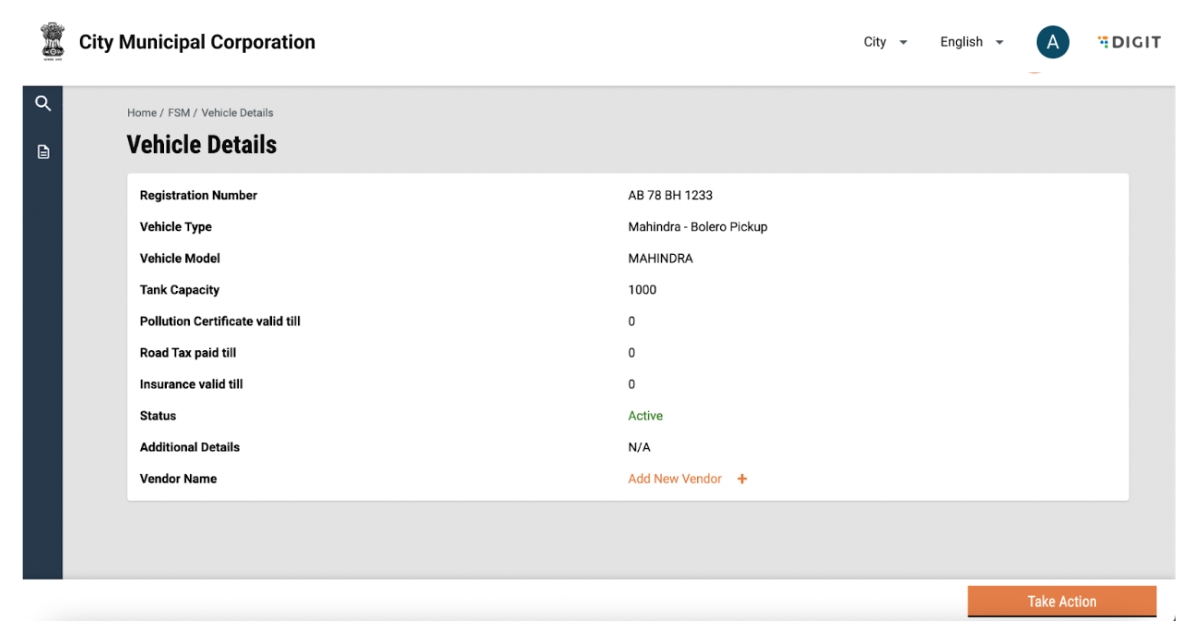
Apart from tagging a vehicle to a vendor from the vendor details page, tagging can also be done from the vehicle details page by clicking on the add vendor button.

User Actions
The following actions can be performed:
View details of the vehicle.
Tagging vehicle to a Vendor by clicking on the ‘+’ icon besides “Add New Vendor”.
A pop-up will be displayed with a dropdown to select a vendor.
User Actions
The following actions can be performed:
Selection of a vendor from the dropdown.
Close pop-up by clicking on the cross icon on the top right of the pop-up.
Close pop-up by clicking on 'Cancel'.
Confirm vendor selection by clicking on 'Submit'.
On clicking submit, the added vendor details will be displayed in the vehicle details page and a snack bar will be displayed for confirmation.
Adding a New Vehicle
Add a new vehicle by clicking on the Add button on the FSM Registry landing page and select vehicle.

User Actions
The following actions can be performed:
Add a new vendor by clicking on vendor.
Add a new vehicle by clicking on vehicle.
Add a new sanitation worker by clicking on sanitation worker.
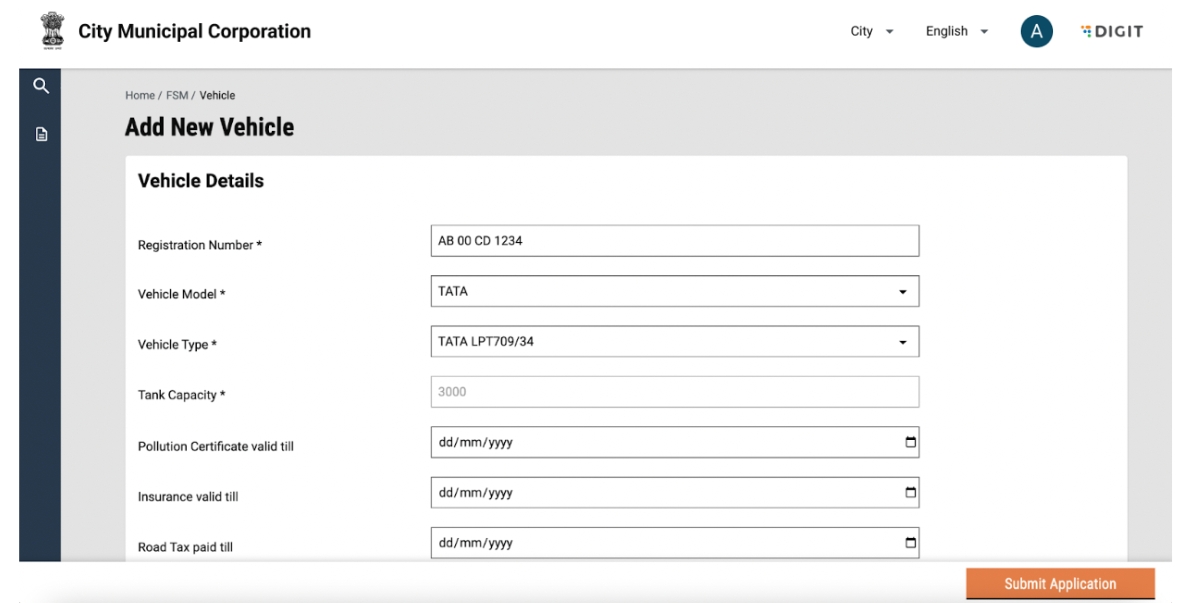
On clicking on ‘Vehicle’, the user will be redirected to the add vehicle page.
User Actions
The following actions can be performed:
Enter the vehicle registration number. Each vehicle is created with a unique registration number and hence, an error message will be displayed if the registration number has been used to create other vehicles.
Select vehicle details such as model, type, capacity, details of pollution certificate, insurance and road tax.
Submit the application.
Once the user submits an application, a snack bar will confirm the successful addition of a vendor.
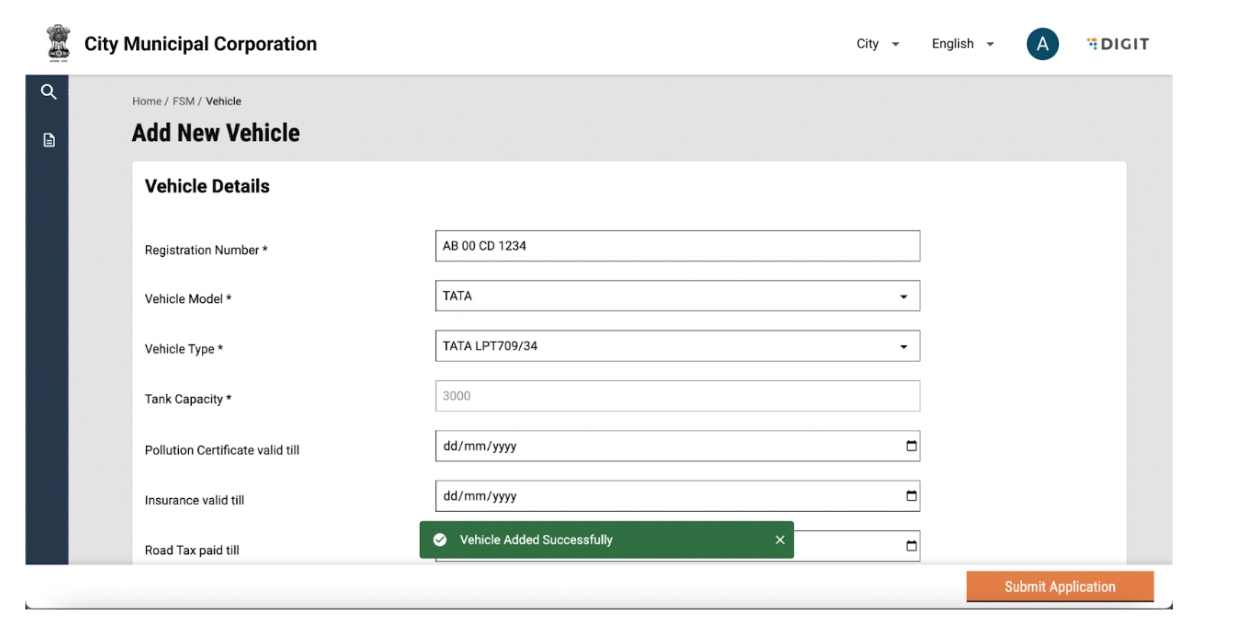
Details of the added vehicle will be displayed in the vehicle list.
View sanitation worker List
Login as a ULB admin and navigate to the FSM Registry by clicking on it. Click on the sanitation worker tab. A list of all sanitation workers in the system is visible along with the details of the vendor they are tagged to.

User Actions
The following actions can be performed:
View the list of all sanitation workers in the system along with the details of tagged vendor.
Search for a sanitation worker using the search box.
Clear search by using the “Clear Search” button.
Enable/disable a sanitation worker by using the toggle.
Sort sanitation workers by creation date.
Add a new vendor, sanitation worker or vehicle by clicking on the ‘Add’ button.
View sanitation worker Details
Sanitation worker details can be viewed by clicking on the sanitation worker’s ID.


User Actions
The following actions can be performed:
View details of the sanitation worker.
Edit vendor tagging by clicking on the edit icon besides the vendor name.
Remove vendor tagging by clicking on the 'Delete' icon beside the vendor name.
Click on the “Take Action” button to edit or delete a sanitation worker.
sanitation worker details can be edited by clicking on the “Take Action" button and selecting edit.

User Actions
The following actions can be performed:
Click on 'Edit' to edit the sanitation worker.
Click on 'Delete' to delete the sanitation worker.
Click anywhere else on the screen to go back to sanitation worker details.
Edit sanitation worker Details
On clicking the Edit button, the user will be redirected to the “Edit Sanitation Worker” page.

User Actions
The following actions can be performed:
Submit edited details like professional, role details.
The user will be redirected to the sanitation worker details page and the edits will be reflected.
Delete sanitation worker Details
A sanitation worker can be deleted by clicking on the “Take Action” button and selecting 'Delete'.

User Actions
The following actions can be performed:
Click on 'Edit' to edit the sanitation worker.
Click on 'Delete' to delete the sanitation worker.
Click anywhere else on the screen to go back to sanitation worker details.
On clicking the 'Delete' button, a pop-up will be displayed for confirmation.

User Actions
The following actions can be performed:
Close pop-up by clicking on the 'Close' button on the pop-up.
Close pop-up by clicking on the cross icon on the top right of the pop-up.
Confirm deletion by clicking on the 'Delete' button.
On clicking on ‘Delete’, the user will be directed to a list of vehicles and a snack bar will be displayed as confirmation.
Tagging a sanitation worker to a Vendor
Method 1: Apart from tagging a sanitation worker to a vendor from the vendor details page, tagging can also be done from the sanitation worker details page by clicking on the add new vendor button.

User Actions
The following actions can be performed:
View details of the vehicle.
Tag sanitation worker to a vendor by clicking on the + icon besides the “Add New Vendor”.
A pop-up will be displayed with a dropdown to select a vendor.

User Actions
The following actions can be performed:
Selection of a vendor from the dropdown.
Close pop-up by clicking on the cross icon on the top right of the pop-up.
Close pop-up by clicking on 'Cancel'.
Confirm vendor selection by clicking on 'Submit'.
On clicking on submit, the added vendor details will be displayed in the sanitation worker details page and a snack bar is displayed for confirmation.

Method 2: A sanitation worker can also be tagged to a vendor from the sanitation worker list page. Select a vendor from the dropdown. The sanitation worker will be tagged to the selected vendor.

Adding a New sanitation worker
Add a new sanitation worker by clicking on the 'Add' button on the FSM Registry landing page and select the sanitation worker.

User Actions
The following actions can be performed:
Add a new vendor by clicking on vendor.
Add a new vehicle by clicking on vehicle.
Add a new sanitation worker by clicking on sanitation worker.
On clicking on sanitation worker, the user will be redirected to the add sanitation worker page.


User Actions
The following actions can be performed:
Enter sanitation worker personal details such as Gender, Mobile number, DOB.
Enter the professional details like skills of the sanitation worker.
Click on "Add Role" to define the role for the sanitation worker if the worker is a driver or a helper or a plant operator.
Submit the application.
Once the user submits an application, a snack bar will confirm the successful addition of a vendor. Details of the added sanitation worker will be displayed in the sanitation worker list.
Was this helpful?